
How to Prepare Garden Soil for Planting (Beginner-Friendly Guide)
Just a heads up — this website includes affiliate links, and occasionally I receive products from brands to try out. As an Amazon Associate, I earn from qualifying purchases. Some content on this site was created with help from AI tools.
I still remember my very first garden… and not in a cute Pinterest-perfect kind of way.
I picked out my little spot, had big dreams of fresh veggies, and put in the work. I hauled soil, planted everything nice and neat, and watered it like it was my job.
But what I didn’t realize?
I was basically trying to grow a garden in drain tile.
Dry, lifeless dirt that water just ran right through. And I kept standing there thinking, “Why is nothing growing?” 😅
That garden was sad, friend. Tiny plants barely hanging on, and me feeling so discouraged after putting so much effort into it.

Here’s what I wish someone told me back then…
👉 It’s usually not you
👉 It’s your soil
Once I figured that out, everything changed. My plants actually started growing, and gardening felt a whole lot easier.
So if you’re out there wondering what went wrong, I’ve been right where you are. Let’s fix your soil so your garden can finally thrive 🌱💛
🌼 Why Soil Preparation Matters (Don’t Skip This!)
I know this is the part most people want to rush through so they can get to the fun part and start planting. I used to do the exact same thing. I figured if I just planted everything nice and neat, kept it watered, and gave it enough attention, it would all work out.
But after that first sad little garden of mine, I learned real quick that wasn’t the case.
👉 It wasn’t me
👉 It was my soil
If your soil isn’t right, your plants are going to struggle no matter how much effort you put in. You can water every day, check on them constantly, do everything “right” above ground… but if what’s underneath isn’t supporting them, they just won’t thrive.
🌱 Good Soil Makes Everything Easier
Your soil is doing way more work than most people realize. It’s feeding your plants, holding onto moisture, and giving roots a place to grow strong and steady. When your soil is healthy, everything in your garden starts to feel easier and more predictable.
Nutrients come straight from the soil
Roots need soft, workable ground to grow
Good soil holds moisture without drowning your plants
This is where I went wrong in the beginning. My soil drained way too fast, so no matter how much I watered, nothing stayed where it needed to be. And when that happens, your plants are always trying to catch up instead of actually growing.
Once you fix your soil, though, it’s a whole different story. Your plants grow stronger, your harvests get better, and you finally start seeing results from all that hard work.
And honestly, that’s the moment gardening starts to feel really rewarding 🌱💛

🌾 Step 1: Start With What You Have
Before you go adding anything, buying anything, or trying to “fix” your soil…
Take a minute and just look at what you’re working with first.
I know it’s tempting to jump straight into compost and fertilizers (I did the exact same thing in the beginning), but this step will save you so much time, money, and frustration. When you understand your soil first, everything you do after that actually works the way it’s supposed to.
Think of it like this… you wouldn’t start baking without checking what ingredients you already have, right?
Your garden is no different.
Every piece of land is a little different. Some soil drains too fast, some holds too much water, and some just needs a little boost to come back to life. When you slow down and observe it first, you stop guessing and start making smart changes that actually help your plants grow.
🌱 Get to Know Your Soil
Go out to your garden spot and grab a handful of soil. Don’t overthink it, just pick some up and see how it feels, how it looks, and how it reacts to water.
This one simple step can tell you so much. You’ll start to notice if your soil feels dry and loose, heavy and sticky, or soft and crumbly. Then, give it a good soak and watch what happens. Does the water disappear right away, sit on top, or slowly soak in? Even the color will give you clues about how healthy your soil is.
Sandy soil → feels gritty, drains too fast
Clay soil → heavy, sticky, holds water
Loamy soil → soft, crumbly, holds moisture just right
Light-colored soil → often low in nutrients
Dark soil → usually richer and more fertile
You don’t need to measure anything or get scientific here. Just pay attention. Your soil will tell you what it needs.
📷 Picture This
A cozy homestead garden scene showing a woman’s hands holding different types of soil, one side dry and sandy, one side dark and rich, with a rustic garden bed in the background. Soft natural sunlight, warm earthy tones, gentle greenery around, peaceful country setting, clean and airy composition, shallow depth of field, Pinterest-style aesthetic, high resolution
💛 Don’t Judge It… Just Learn It
This part matters more than you think.
It’s really easy to look at your soil and feel like you’re already behind, especially if it doesn’t look anything like those perfect garden photos. But every good garden starts somewhere, and most of them didn’t begin with perfect soil either.
This step is just about understanding what you have right now so you can make it better. And the good news is, no matter what your soil looks like today… you can improve it from here 🌱💛
🌿 Step 2: Clear and Clean Your Garden Area
Before you start improving your soil, you want to give it a clean slate to work with.
I know it can feel a little tedious, especially if your space is overgrown or hasn’t been touched in a while, but this step makes everything easier moving forward. When you remove what’s in the way, your soil can actually absorb nutrients properly and your plants won’t have to compete for space, water, or sunlight.
Think of it like prepping your kitchen before cooking. It just makes the whole process smoother.
🌱 Clear Out the Basics
Start by removing anything that doesn’t belong in your garden bed.
Take your time here. You don’t need to rush it or make it perfect, just focus on getting the main stuff out so your soil is ready to be worked.
Pull out weeds, including the roots if you can
Remove rocks and debris
Get rid of old roots or leftover plant material
Weeds especially will compete with your plants for nutrients, so the more you can remove now, the less trouble you’ll have later on.
📷 Picture This
A before-and-after split image of a small garden bed. One side shows an overgrown patch with weeds, rocks, and messy soil. The other side shows the same garden bed cleared and tidy with smooth soil ready to be worked. Rustic homestead setting, soft sunlight, natural greens and browns, cozy country aesthetic, clean and airy composition, Pinterest-style vertical layout, high resolution
💛 Progress Over Perfection
This part doesn’t have to be perfect to be effective.
If you miss a few small roots or a weed pops back up later, it’s not the end of the world. Gardening is always a bit of a work in progress, and you’ll keep adjusting as you go.
The goal here is just to give your soil a fresh start so everything you add next actually works the way it should 🌱💛
🌿 Step 3: Test Your Soil (The Easy Way)
Now that your space is cleared, this is where you get a little more insight into what your soil actually needs.
Don’t worry, we’re not getting complicated here. You don’t need anything fancy or scientific. This is just about getting a general idea so you’re not guessing when it comes to improving your soil.
🌱 Simple Soil Testing
You’ve already learned a lot just by looking and feeling your soil, but this step helps you go one level deeper.
You can grab an inexpensive soil test kit, or even just focus on the basics like how your plants have been growing and what your soil looks like overall. We’re keeping this simple and beginner-friendly.
Check if your soil is more acidic or alkaline
Notice if plants struggle in certain spots
Pay attention to how your soil reacts to water
You don’t need perfect numbers here. Just a general understanding goes a long way.
📷 Picture This
A cozy gardening scene with a simple soil test kit on a rustic wooden surface beside small jars of soil samples, a notebook, and garden tools. Soft natural lighting, warm farmhouse tones, touches of greenery, clean and airy composition, shallow depth of field, Pinterest-style aesthetic, high resolution
💛 Keep It Simple
It’s really easy to overthink this step, but you don’t need to.
You’re not trying to become a soil expert overnight. You’re just learning enough to make better decisions for your garden. Even a basic understanding of your soil will help you improve it in the right way.
And once you know what you’re working with, the next step is where the real magic starts 🌿✨
🌻 Step 4: Improve Your Soil (This Is Where the Magic Happens)
Alright… this is the part where everything starts to come together.
You’ve looked at your soil, you’ve cleared your space, you’ve got a general idea of what you’re working with. Now we actually make it better.
And I’m going to tell you the honest truth here…
You do not need a bunch of fancy products or expensive fixes.
Most of the time, the answer is simple.
👉 Add organic matter
This is what took my soil from dry, lifeless, and frustrating… to something that actually grew food.
🌱 Start With Organic Matter (Your Best Friend)
If you do nothing else after this step, do this.
Organic matter fixes almost everything. It helps sandy soil hold water, helps clay soil loosen up, and adds the nutrients your plants have been missing. It’s the one thing that works across the board no matter what kind of soil you have.
Think of it as feeding your soil so your soil can feed your plants.
Compost (kitchen scraps, garden waste, store-bought)
Aged manure (perfect if you’ve got animals 👀)
Leaf mold or broken-down leaves
Spread a good layer over your garden bed and gently mix it into the top few inches of soil. You don’t need to go deep. Even a little bit makes a big difference.
🌿 Fix What Your Soil Is Missing
Now that you’ve got that base, you can tweak things depending on what you noticed earlier.
This doesn’t have to be complicated. Just small adjustments based on what your soil is already doing.
If your soil drains too fast (sandy)
Add more compost to help it hold moistureIf your soil holds too much water (clay)
Add compost to loosen it up and improve drainageIf your soil looks pale and tired
Organic matter will help bring it back to life
You’ll notice compost is the answer to almost everything… and that’s not by accident 😅
📷 Picture This
A close-up of rich, dark compost being spread over a garden bed and gently mixed into the soil with a hand rake. Visible contrast between lighter soil underneath and dark organic matter on top. Warm sunlight, rustic homestead setting, earthy tones, soft greenery in the background, clean and airy composition, shallow depth of field, Pinterest-style aesthetic, high resolution
💛 Build It Over Time
You don’t have to fix everything in one day.
Healthy soil is something you build over time, season by season. Every time you add compost or organic matter, you’re improving what you have and making next year even easier.
And the best part? Once your soil starts improving, you’ll see it. Your plants will tell you.
🌼 Step 5: Till or No-Till? (Keep It Simple)
Okay, let’s talk about something that confuses a lot of beginners.
Tilling vs no-till.
You’ll hear strong opinions on both sides, and if you go down that rabbit hole, it can get overwhelming real fast. So let’s keep this simple and real-life.
You do not need to overthink this.
🌱 What You Actually Need to Know
Tilling just means turning and loosening your soil. No-till means leaving the soil structure mostly undisturbed and adding on top instead.
Both methods can work. What matters most right now is where you’re starting from.
Tilling helps mix in compost quickly and loosen compacted soil
No-till helps protect soil structure and build long-term health
If your soil is hard, compacted, or hasn’t been worked before, a little loosening can really help in the beginning.
🌿 A Simple Beginner Approach
Here’s what I recommend, especially if you’re just starting out.
Keep it gentle and don’t go overboard.
Use a shovel or garden fork to lightly turn the top layer of soil and mix in your compost. You’re not trying to completely flip your garden upside down, just loosen things enough so roots can grow and nutrients can spread.
Loosen the top few inches of soil
Mix in your organic matter
Break up large clumps as you go
That’s it. It doesn’t need to be complicated.
📷 Picture This
A cozy homestead garden scene showing someone gently turning soil with a garden fork in a raised bed, mixing in compost. Soft sunlight, rustic tools nearby, loose crumbly soil texture visible, peaceful country setting, warm earthy tones, clean and airy composition, Pinterest-style aesthetic, high resolution
💛 Don’t Overdo It
This is where a lot of people go too far.
Over-tilling can actually break down your soil structure and cause more problems long-term. You don’t need to keep turning it over again and again.
Just loosen it, mix in the good stuff, and let your soil start doing its thing.
Simple, steady, and doable… just how we like it 🌱💛
🌿 Step 6: Level and Shape Your Garden Beds
Now that your soil is loosened and full of all that good organic matter, it’s time to bring everything together and get it ready for planting.
This part might seem small, but it makes a big difference in how your garden looks, drains, and grows. It’s kind of like making the bed before you crawl in at night… everything just feels better when it’s smoothed out and in place.
🌱 Shape It So It Works for You
Take a rake or even just the back of your shovel and gently level out your soil.
You’re not trying to make it perfect, just even enough so water doesn’t pool in random spots and your plants have a nice place to grow. This is also where you can decide how you want your garden laid out.
Smooth out the surface of your soil
Break up any large clumps
Create rows, mounds, or flat beds depending on your space
If you’re planting in rows, give yourself enough space to walk between them. Trust me, your future self will thank you when it’s time to weed or harvest.
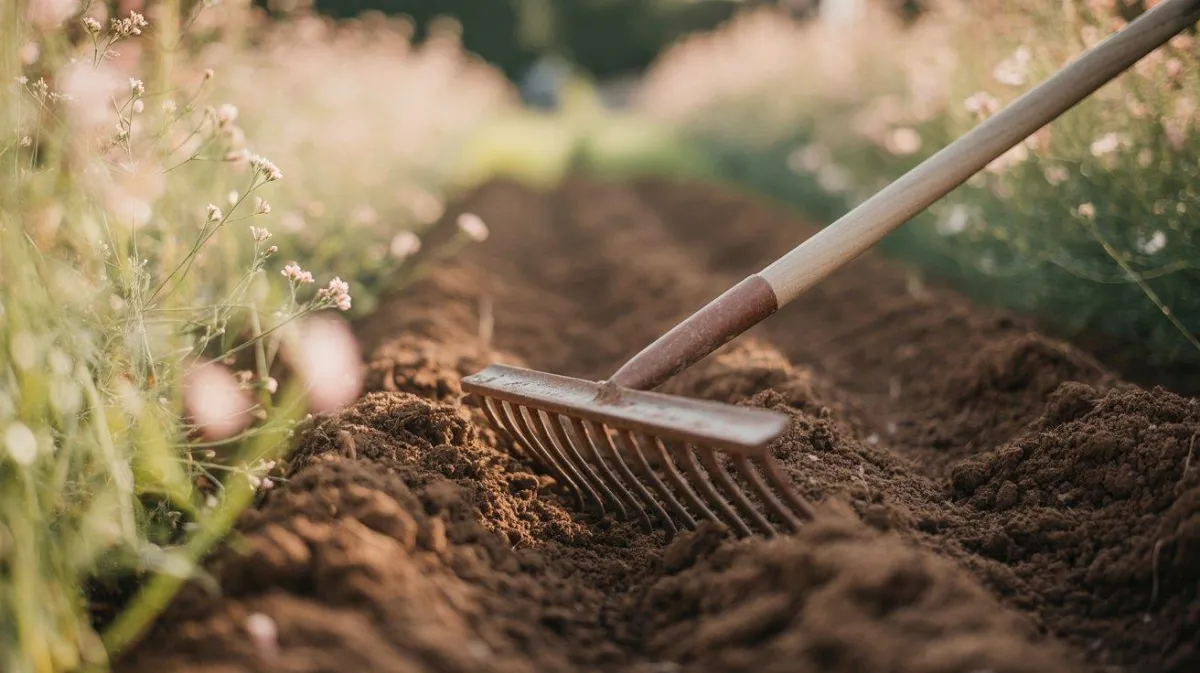
📷 Picture This
A freshly prepared garden bed with smooth, level soil shaped into neat rows, soft sunlight shining across the surface, a rustic rake resting nearby, small seedlings just beginning to be planted, peaceful homestead setting, warm earthy tones, clean and airy composition, Pinterest-style aesthetic, high resolution
💛 Make It Practical, Not Perfect
Your garden doesn’t need to look like a magazine to grow well.
Focus on making it functional for your space and your routine. If it’s easy to walk through, easy to water, and easy to plant, you’re doing it right.
This is your garden… it gets to work for you 🌿💛
🌱 Step 7: Let Your Soil Rest (Most People Skip This!)
I know, I know… at this point you just want to plant already.
You’ve done all this work, your soil looks good, and you’re ready to get those seeds in the ground. But giving your soil a little time to rest can make a bigger difference than you think.
🌿 Why This Step Matters
When you’ve just mixed in compost and worked your soil, everything is a bit… unsettled.
Letting it sit for a few days gives the soil time to balance out, moisture to spread evenly, and all those nutrients to start doing their thing. It’s like letting a good meal simmer instead of rushing it.
Helps moisture settle evenly
Gives nutrients time to integrate
Allows soil structure to stabilize
You don’t have to wait forever. Even a couple of days helps.
📷 Picture This
A peaceful garden bed resting in soft evening sunlight, freshly prepared soil sitting undisturbed with a gentle watering can nearby, calm homestead setting, warm golden tones, soft greenery around, clean and airy composition, Pinterest-style aesthetic, high resolution
💛 A Little Patience Goes a Long Way
This is one of those small steps that feels easy to skip, but it really does help set your garden up for success.
You’ve already put in the work. Let your soil settle, breathe, and come together before you plant.
And then… you’re ready for the best part 🌱💛
🌸 Step 8: Final Prep Before Planting
Alright… this is it. The moment you’ve been working toward.
Your soil is improved, shaped, and rested. Now we’re just doing a few final touches to make sure everything is just right before those seeds or plants go in.
This step is simple, but it pulls everything together and sets your garden up for the best possible start.
🌱 Give It One Last Check
Before you plant anything, take a few minutes to walk through your garden bed and really look at it.
You’re just making sure everything still looks and feels good after resting. Sometimes a few weeds pop back up, or the surface gets a little uneven again, and this is your chance to quickly fix that.
Lightly rake the top to smooth it out
Remove any new weeds or debris
Break up any crusted or compacted spots
Think of this as your final “reset” before planting.
💧 Check Your Moisture Level
This one makes a bigger difference than most people realize.
You don’t want your soil soaking wet, and you don’t want it bone dry either. You’re aiming for that slightly damp, soft feel that holds together but still crumbles easily.
Too dry → seeds struggle to sprout
Too wet → risk of rot and poor growth
Just right → gives seeds the best start
If needed, give your soil a light watering and let it soak in before planting.
🌿 Now You’re Ready to Plant
This is the fun part you’ve been waiting for.
Because you took the time to prepare your soil properly, your seeds and plants are going into an environment that actually supports them. You’re not guessing anymore, you’re setting them up to grow strong right from the start.
And that right there?
That’s the difference between struggling through a season and actually enjoying it 🌱💛
🌾 Common Soil Prep Mistakes to Avoid
Let me save you a little frustration here… because I’ve made most of these myself 😅
Even when you’re trying to do everything right, there are a few things that can trip you up if you don’t know to look for them.
🚫 Adding Fresh Manure Too Close to Planting
This one feels like a good idea… but it can actually harm your plants.
Fresh manure is too strong and can burn roots or introduce problems into your soil. It needs time to break down first.
Always use aged or composted manure
If using fresh, apply it well before planting season
🚫 Ignoring Drainage Issues
If your soil holds too much water or drains too fast, your plants will struggle no matter what else you do.
This is one of those foundational things that’s easy to overlook but makes a huge difference.
Watch how water behaves in your soil
Adjust with organic matter as needed
🚫 Over-Tilling Your Soil
It’s easy to think more is better here… but it’s not.
Over-tilling can break down your soil structure and actually make things worse over time.
Loosen soil gently
Avoid repeatedly turning it over
🚫 Skipping Organic Matter
If you skip this, you’re making things harder than they need to be.
Organic matter is what brings your soil to life. Without it, you’re always going to be trying to make up for what’s missing.
Compost is your best friend
Add it regularly, not just once
📷 Picture This
A comparison-style garden scene showing small struggling plants in poor soil on one side and healthy thriving plants in rich dark soil on the other, clear visual contrast, rustic homestead setting, warm sunlight, lush greenery on the healthy side, dry sparse plants on the poor side, clean and airy composition, Pinterest-style vertical layout, high resolution
🌿 Homestead Tips for Better Soil (Your Secret Weapon)
This is where you start thinking long-term… and honestly, this is where the magic really happens.
Good soil isn’t a one-time fix. It’s something you build over time, season by season. And the more you work with it, the easier your garden gets.
🌱 Feed Your Soil Year-Round
Don’t wait until planting season to take care of your soil.
Adding organic matter regularly keeps everything active and improving, even when you’re not actively growing.
Add compost in spring and fall
Use garden scraps and kitchen scraps
Keep that soil covered when you can
🐔 Use What You Already Have
If you’re on a homestead, you’ve probably got more resources than you think.
This is one of those areas where homesteading really shines.
Chicken manure (aged!) is amazing for soil
Leaves, grass clippings, and scraps all add value
Nothing needs to go to waste
🌿 Mulch Is a Game Changer
Once you plant, don’t leave your soil bare.
Mulch helps hold moisture, protect your soil, and slowly adds nutrients back in as it breaks down.
Straw, leaves, or grass clippings work great
Helps reduce weeds and watering needs
💛 Think Long-Term, Not Perfect
Your soil doesn’t have to be perfect this season.
What matters is that you’re improving it little by little. Every season you’ll notice a difference, and it gets easier each year.
And that’s the kind of progress that actually sticks 🌱💛
🌻 Conclusion
If there’s one thing I hope you take away from all of this, it’s this…
You don’t need perfect soil to grow a garden.
I sure didn’t start with it. I started with that dry, lifeless patch that barely grew anything, and I honestly thought I just wasn’t cut out for gardening.
But once I learned how to work with my soil instead of against it, everything changed.
Your soil is your foundation. Take a little time to care for it, and it will take care of your garden right back.
So start small, do what you can, and don’t overthink it.
Your future harvest starts right here 🌱💛
