
How to Start Canning at Home: A Beginner’s Guide
Just a heads up — this website includes affiliate links, and occasionally I receive products from brands to try out. As an Amazon Associate, I earn from qualifying purchases. Some content on this site was created with help from AI tools.
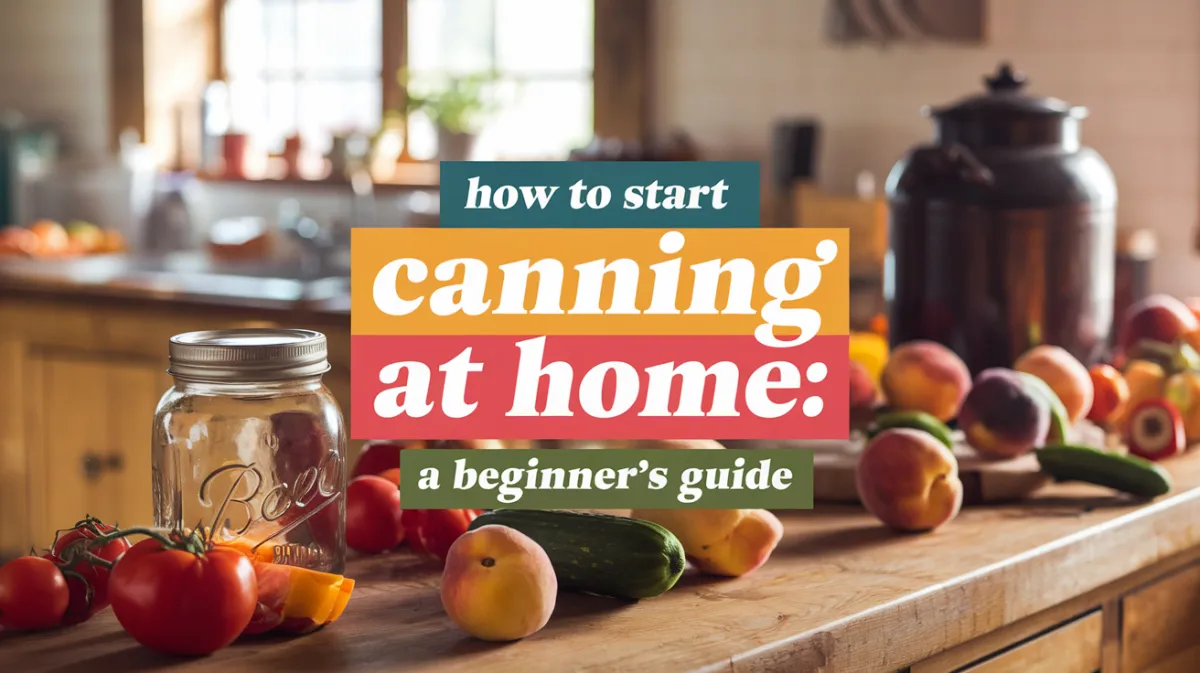
The first time I filled my pantry shelves with jars of food I had preserved myself, I felt a kind of pride that is hard to describe. Canning quickly became more than just a way to store food. It became part of my seasonal rhythm, right alongside gardening, harvesting, and cooking from scratch. Now every year, as the produce starts coming in, I naturally shift into canning mode, and my kitchen turns into a space filled with bubbling pots, warm jars, and the quiet satisfaction of knowing I am putting real food away for my family.
. A canning jar with a lid is placed prominently, and a vintage canning pot is visible in the background.")
If you have ever looked at rows of home-canned food and wondered if you could do it too, I want you to know that you absolutely can. Once you understand the basic process and have the right tools, canning becomes a simple and deeply rewarding skill that saves money, reduces waste, and fills your pantry with meals you can feel good about.
What You Need to Know Before You Begin Canning
The very first thing I learned about canning is that it all comes down to safety. Using the correct equipment and following tested methods is what protects your food and your family. That might sound intimidating at first, but once you understand the basics and go through the process a few times, it truly becomes second nature.
At its core, canning is the method of preserving food by sealing it in jars and heating those jars to destroy harmful bacteria and enzymes. This is what allows your food to be stored on the shelf for months instead of taking up space in the fridge or freezer. It is one of the most practical ways I know to make the most of a garden harvest or a great farmers market haul.
When I first started, I found it easiest to work with high-acid foods. These are processed using a water bath canner and are very beginner-friendly.
These include:
✅ Tomatoes
✅ Peaches
✅ Pickles and cucumbers
✅ Jams and jellies

Low-acid foods like vegetables, soups, and meats require a pressure canner to be processed safely, and I always recommend learning the water bath method first to build confidence.
There are also a few things that should never be canned at home, such as dairy products or recipes that have not been tested for safe preservation. Following trusted guidelines is what makes home canning both safe and successful.
Once you understand these simple foundations, the entire process starts to feel far less overwhelming and a lot more rewarding.

Basic Canning Equipment
Before I ever start a canning day, I make sure all my tools are laid out and ready to go. Having the right equipment not only makes the process easier, it also makes it safer and far more enjoyable. The good news is that once you invest in these basics, you will use them season after season.

Here are the essential tools I reach for every time I can:
✅ Canning Jars - Grab them on Amazon
You will need mason jars with proper lids and bands designed specifically for canning. I use a mix of pint and quart jars depending on what I am preserving, but for beginners, these sizes are the most practical and versatile.
✅ Pressure Canner - Grab it on Amazon or Water Bath Canner - Grab it on Amazon
These are the two processing methods used in home canning. I use my water bath canner for high-acid foods like fruits, pickles, and jams. For low-acid foods such as vegetables, soups, and meats, a pressure canner is essential for safe preservation.
✅ Jar Lifter - Grab it on Amazon
This is one tool I never skip. A jar lifter allows you to move hot jars in and out of boiling water safely and keeps you from risking burns.
✅ Canning Funnel - Grab it on Amazon
A canning funnel helps you fill jars cleanly and keeps the rims free of food so the lids can seal properly.
✅ Magnetic Lid Lifter - Grab it on Amazon
This simple tool makes it easy to lift lids out of hot water without touching them, which keeps the process more sanitary and much less awkward.
✅ Bubble Remover and Headspace Tool - Grab it on Amazon
This small tool makes a big difference. I use a bubble remover and headspace tool to release trapped air before sealing my jars and to make sure the headspace is accurate. It is one of those simple things that helps ensure a safe, reliable seal every time.
Once you have these tools in your kitchen, you are fully set up to handle everything from small batches of jam to full pantry restocks during harvest season.
Step-by-Step Guide to the Canning Process
1. Prepare Your Food
Before I even think about filling a single jar, I focus on getting all of my produce prepped and ready. This is the part that makes the entire canning day run smoothly. When everything is washed, peeled, and cut ahead of time, the process feels calm and organized instead of rushed.
Here is how I prepare my fruits and vegetables.
✅ Wash
I start by washing everything thoroughly to remove dirt, debris, and anything that came in from the garden or the market. Clean produce is the foundation of safe canning.
✅ Peel
Some foods need the skins removed for the best texture and quality. When I am working with tomatoes or peaches, I blanch them first so the skins slide right off.
✅ Chop or slice
Next, I cut everything to the size I want for the jars. This might mean chopping tomatoes for salsa, slicing cucumbers for pickles, or halving peaches for syrup. Keeping the pieces uniform helps them pack better and process evenly.
✅ Blanch when needed
Blanching is a step I often use, especially for tomatoes and peaches. A quick dip in boiling water followed by cold water loosens the skins and makes peeling fast and easy.
Taking the time to do this prep work at the beginning makes the rest of the canning process feel simple and much more enjoyable.
2. Sterilize the Jars and Lids
Making sure my jars are properly sterilized is one step I never rush. Clean, hot jars are essential for safe food preservation and for getting a good seal once the processing time is finished.
Here is the method I use every canning day.
✅ Boil water
I start by bringing a large pot of water to a steady boil. If I am using my water bath canner, I often use it so everything is ready in one place.
✅ Sterilize the jars and lids
I place my clean mason jars into the hot water and keep them there for about 10 minutes. This ensures they are fully heated and free from any bacteria that could cause spoilage. I also keep the lids in hot water so the sealing compound is softened and ready to use.
✅ Remove the jars safely
When it is time to fill them, I lift the jars out using my jar lifter, carefully pouring the hot water back into the pot. Keeping the jars hot prevents them from cracking when the food is added and helps maintain a safe canning temperature.
Taking a few extra minutes for this step gives me complete confidence that everything going into my pantry is preserved properly.

3. Pack the Jars
Once my food is prepped and my jars are hot, this is the part where everything starts to feel real. Packing the jars is when you see all that fresh produce turn into something that will soon be sitting on your pantry shelves.
There are two different methods I use, depending on what I am canning.
Hot Pack Method
With the hot pack method, I heat the food before placing it into the jars.
✅ I simmer the fruits or vegetables according to the recipe.
✅ Then I ladle the hot food into the hot mason jars using my canning funnel to keep the rims clean.
I use this method most often for foods like tomatoes, sauces, and meats because it removes extra air from the food, helps with better packing, and improves the overall shelf life.
Cold Pack Method
When I first started canning, this was the method that helped me build confidence.
✅ I pack the raw, prepared produce directly into the hot jars.
✅ Then I pour the hot liquid or syrup over the top, depending on the recipe.
This works especially well for foods like peaches, pickles, and many jams, and it is one of the simplest ways for beginners to get started.
Getting the Headspace Right
One of the most important details in this step is leaving the correct headspace.
✅ I leave about 1/2 inch of space at the top of the jar, unless the recipe says otherwise.
✅ I use my bubble remover and headspace tool to release trapped air and measure the space accurately.
This small step plays a big role in getting a proper seal and making sure the jars process safely.
Once the jars are packed, I wipe the rims clean, place the lids on, and get ready for the canner.
4. Seal and Process the Jars
Once my jars are filled and the headspace is correct, it is time to seal everything up and get them into the canner. This step is simple, but doing it carefully makes all the difference.
Sealing the Jars
Here is exactly what I do.
✅ Wipe the rim
Before placing the lids on, I always wipe the jar rims with a clean, damp cloth. Even a small bit of food residue can prevent a proper seal, so I never skip this step.
✅ Place the lids
I center the warm lids on top of each jar, making sure they sit flat and even.
✅ Tighten the bands
Then I screw on the bands until they are fingertip tight. I do not crank them down. They only need to be snug enough to hold the lid in place while allowing air to escape during processing.
Once everything is sealed, it is time for the most important part of the process.
Processing the Jars
This is where the actual preservation happens. The heat destroys harmful bacteria and creates the vacuum seal that keeps your food shelf stable.
✅ Pressure canning
If I am preserving low-acid foods like vegetables, soups, or meats, I use my pressure canner. This allows the jars to reach the higher temperature required for safe preservation.
✅ Water bath canning
For high-acid foods like fruits, jams, pickles, and properly acidified tomatoes, I use my water bath canner. The jars must be fully submerged in boiling water and processed for the exact time listed in the recipe.
I always follow tested processing times and adjust for my altitude when needed. That attention to detail is what makes home canning both safe and dependable.
When the processing time is complete, I turn off the heat and let the jars rest before removing them carefully with my jar lifter.
And then comes my favorite part, waiting to hear that first little ping.

5. Cool and Store the Jars
Once the processing time is complete, the real magic starts to happen. This is the part where patience matters most.
Removing the Jars
✅ Lift them out carefully
I use my jar lifter to remove each jar from the canner, keeping them upright the entire time. I place them on a thick towel or cooling rack on the counter where they can sit undisturbed.
It is important not to tilt the jars or tighten the bands at this stage. I simply let them rest.
Waiting for the Seal
Then I wait.
Over the next several hours, as the jars cool, I start to hear that unmistakable pop. That sound never gets old. It means the lid has sealed and a vacuum has formed inside the jar.
I let my jars sit for 12 to 24 hours without touching them so the seal can fully set.
Checking the Seals
Once they are completely cool, I check every single jar.
✅ I press down gently on the center of each lid.
✅ If it does not move or pop back, the jar is properly sealed.
If a jar did not seal, I refrigerate it and use it within a few days.
Storing Your Jars
After removing the bands, I label each jar with the contents and date. Then I store them in a cool, dark place like my pantry shelves.
Properly processed and sealed jars can last up to a year, sometimes longer, though we usually eat ours well before that.
By following these steps, you can safely preserve everything from fruits and vegetables to soups and meats. I know the process can feel overwhelming the first time, but I promise it becomes more natural with every batch. Before long, you will be lining up jars on your shelves and feeling that same quiet pride that hooked me from the very beginning.
There is something deeply satisfying about opening a jar in the middle of winter and knowing you preserved it yourself. It connects the seasons, the garden, and your kitchen in the most practical and rewarding way.
Common Canning Mistakes to Avoid
When I first started canning, I definitely learned a few lessons the hard way. The good news is that most canning mistakes are easy to avoid once you know what to watch for. If you keep these in mind, you will save yourself frustration and protect all that hard work.
Here are the biggest mistakes I see beginners make.

1. Not Using the Right Jars
I always use jars specifically designed for canning. Regular store-bought jars from pasta sauce or pickles are not made to handle the pressure and heat of home canning.
Stick with proper canning jars and new lids each time. It makes a huge difference in getting a reliable seal.
2. Skipping the Sterilization Step
It can be tempting to rush this part, especially when you have a lot of produce waiting on the counter. But sterilizing your jars properly is one step I never skip.
A quick rinse is not enough. Clean, hot jars are essential for safe food preservation and long shelf life.
3. Overfilling the Jars
Headspace matters more than most people realize. I always leave the recommended amount of space at the top of each jar, usually about half an inch unless the recipe says otherwise.
Overfilling can prevent a proper seal and may even cause food to leak during processing.
4. Improper Processing Time
This is one of the most important details in the entire process. Processing times vary depending on what you are canning, the size of the jars, and even your altitude.
I always follow tested, trusted canning guidelines and never guess on timing. That consistency is what makes my pantry shelves feel safe and dependable year after year.
Canning has a learning curve, but once you understand these common mistakes, the process becomes much smoother. Every batch builds confidence, and before long, these safety steps feel completely natural.
Tips for Success
Over the years, I have found that a few simple habits can make canning days smoother and far more rewarding. These are the little things I always remind myself of, especially during a busy harvest season.
To make sure your canning experience is a success, here are some tips:
Double-check that all jars have sealed properly. You can test by pressing the center of each lid—if it doesn’t pop back, the jar has sealed.
Store your jars in a cool, dark place, and make sure they’re away from any direct sunlight or heat sources.
If you’ve never canned before, start small. Try canning just a few jars of your favorite fruit or veggie before moving on to larger batches.
Conclusion
There you have it—your beginner’s guide to canning at home! Now that you know the basics, it’s time to gather your gear, pick some fresh produce, and start preserving the season. Canning is a rewarding process that’s both fun and practical. Plus, there’s nothing like enjoying homemade preserves all year long.
