
9 Simple Indoor Herb Garden Ideas for Busy Women Who Want Fresh Herbs
You want fresh herbs in your kitchen? You know, the kind you can snip while dinner’s cooking, but you don’t want another project that needs constant attention. Between work, home, and everything else pulling at you, your time is already stretched thin. The good news is that an indoor herb garden doesn’t have to be complicated or high-maintenance to work.

You don’t need a perfect setup, a big space, or a green thumb. You just need a few smart choices that fit your real life. When your herbs are easy to see, easy to water, and easy to use, they’re far more likely to survive. These indoor herb garden ideas are designed for busy women who still want fresh herbs without the fuss.
Let’s start with the simplest setup of all.
1. A Sunny Windowsill Indoor Herb Garden
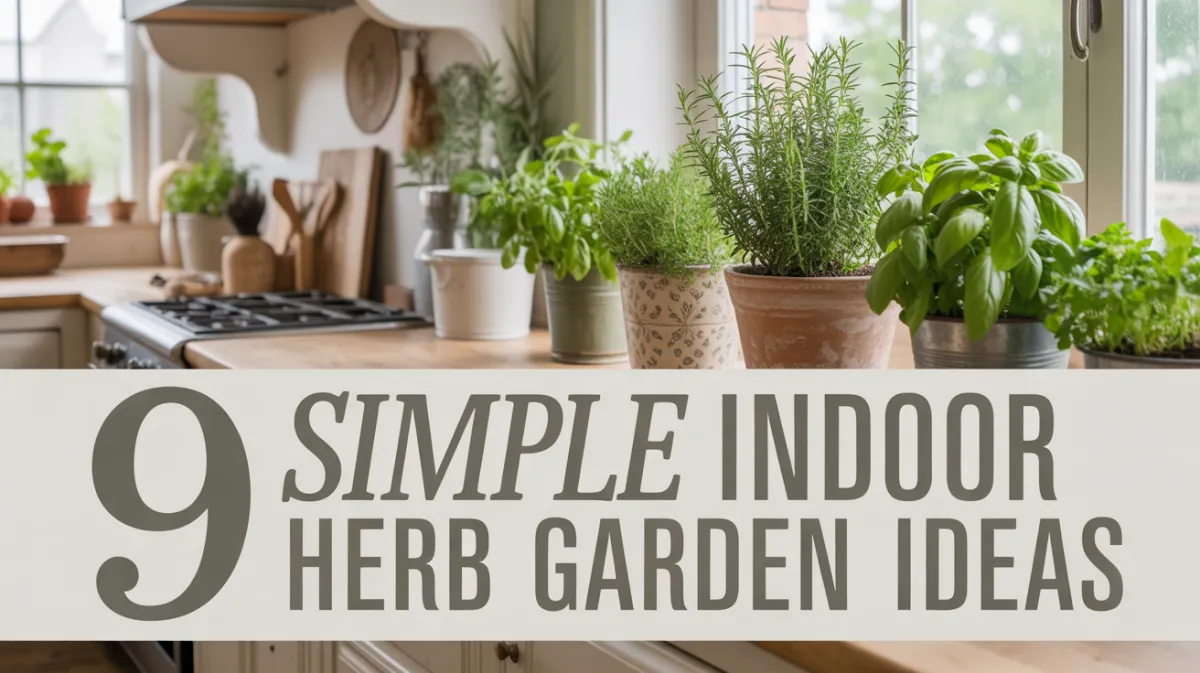
If you have one bright window, you already have everything you need for an indoor herb garden. A windowsill setup is simple, low-maintenance, and easy to keep alive. This matters when your days are already full.
This type of indoor herb garden works because it keeps your herbs visible, close to your kitchen, and easy to care for. No extra steps, no complicated systems.

Step 1: Choose the Right Window
Look for a window that gets bright, indirect sunlight for most of the day. South- or west-facing windows usually work best, but any bright window can work with the right setup.
If your window gets intense sun, a sheer curtain can help protect tender leaves from burning while still letting in plenty of light.
Step 2: Pick Pots That Drain Well
Drainage is one of the most important parts of a successful windowsill herb garden.
Choose small to medium-sized planters with drainage holes so excess water can escape. Terracotta pots are a great option because they help prevent overwatering, while ceramic pots with trays underneath keep your windowsill clean.
A slim plant saucer or tray under each pot will catch water without cluttering your space.
Step 3: Use a Quality Potting Mix
Skip garden soil, it’s too heavy for indoor herbs.
A lightweight indoor potting mix helps roots breathe and prevents soggy soil. If you want extra protection against overwatering, mix in a bit of perlite to improve drainage.
Good soil means healthier plants and less guesswork for you.
Step 4: Start With Easy Herbs
For a windowsill indoor herb garden, choose herbs that adapt well to indoor conditions.
The easiest options include Basil, Chives, Parsley, and Thyme!
You can start with small herb plants from a nursery or grocery store or start them from seed.
Step 5: Water Less Than You Think
Overwatering is the fastest way to kill indoor herbs.
Before watering, stick your finger about an inch into the soil. If it feels dry, water slowly until it drains out the bottom. If it still feels damp, wait another day or two.
A small watering can with a narrow spout makes this quick and mess-free.
Step 6: Rotate and Harvest Regularly
Turn your pots every few days so each plant gets even sunlight and grows evenly.
Harvest your herbs often by snipping just above a leaf node using small herb scissors. Regular harvesting encourages new growth and keeps your herbs from getting leggy.
2. A Countertop Indoor Herb Garden You’ll Actually Use
If you’re always forgetting about plants tucked away in windows or corners, a countertop indoor herb garden might be your best option. When your herbs live right where you cook, you’re more likely to water them, trim them, and actually use them.
This setup is all about convenience. No extra steps, no hunting for scissors, just fresh herbs within arm’s reach.

Step 1: Choose a Spot Near Where You Cook
Pick a spot on your counter that’s close to the stove or prep area but not directly above heat. A corner near a window is ideal, but even a bright kitchen without direct sunlight can work with the right tools.
The key is visibility. If you can see your herbs while cooking, you’ll remember they’re there.
Step 2: Keep the Number of Herbs Small
Counter space is valuable, so don’t overcrowd it.
Stick to 3–5 herbs max. This keeps your kitchen from feeling cluttered and makes daily care quick and manageable.
Great countertop herb choices include Basil, Chives, Parsley, Thyme, and Oregano!
Step 3: Use Matching Counter-Friendly Planters
Matching planters instantly make your herb garden feel intentional instead of messy.
Look for compact ceramic or stoneware planters with drainage holes and a shallow tray. These stay stable on the counter and are easy to wipe clean.
Uniform pots also help you notice when one plant needs water before the others.
Step 4: Add a Small Grow Light if Needed
If your kitchen doesn’t get enough natural light, a small countertop grow light can make all the difference.
Clip-on or under-cabinet grow lights are perfect for this setup. Set it on a timer so your herbs get consistent light without you having to think about it.
Step 5: Make Watering and Harvesting Effortless
Keep a small watering can and herb scissors nearby so care takes less than a minute.
Water only when the top inch of soil feels dry, and harvest regularly to encourage fresh growth. Snipping herbs while you cook keeps plants healthy and saves you time.
3. An Indoor Herb Garden With a Small Grow Light
If your home doesn’t get consistent natural light, this setup can be a total game-changer. A grow light indoor herb garden allows you to grow fresh herbs year-round without rearranging your life around the sun.
This option works especially well in winter, in north-facing kitchens, or in homes where windows are limited. The best part? You don’t need a big, complicated system, just a small, reliable light and a simple setup.

Step 1: Choose a Compact Grow Light
Look for a small clip-on, shelf-mounted, or under-cabinet grow light designed for indoor plants. You don’t need anything bulky or industrial. A simple LED grow light with a neutral or warm glow blends nicely into your space and doesn’t feel harsh.
Many grow lights now come with built-in timers, which makes this setup almost hands-off.
Step 2: Place Herbs at the Right Distance
Position your herbs about 6–12 inches below the light. This gives them enough brightness to grow strong without stressing the leaves.
If your herbs start stretching upward or looking pale, the light is too far away. If leaves curl or discolor, move the light slightly higher.
Step 3: Use Consistent, Simple Containers
Stick with small to medium pots with drainage holes, just like you would for a windowsill or countertop garden. Consistency matters more than looks here, matching pots help you notice growth changes and watering needs faster.
Use a drip tray or narrow shelf liner underneath to protect surfaces.
Step 4: Pick Herbs That Thrive Under Grow Lights
Some herbs adapt especially well to artificial light and grow beautifully indoors.
Great choices are Basil, Parsley, Chives, Thyme, and Oregano!
Tip! Starting with nursery plants instead of seeds can help you see faster results and keeps this setup beginner-friendly.
Step 5: Set It and Forget It
Set your grow light timer for 12–14 hours per day, then let it do the work for you. Water only when the top inch of soil feels dry, and rotate pots occasionally so growth stays even.
Keep herb scissors nearby and harvest regularly. Trimming encourages fuller plants and keeps your herbs from becoming leggy.
4. A Mason Jar Indoor Herb Garden (Water-Only Method)
If you want the lowest-maintenance option possible, a water-only mason jar indoor herb garden is hard to beat. There’s no soil to mess with, no drainage issues to worry about, and it’s easy to see when your herbs need attention.
This setup works best for herbs you use often and don’t mind refreshing from time to time. It’s simple, clean, and perfect for small kitchens.

Step 1: Choose Wide-Mouth Mason Jars
Wide-mouth mason jars make it easy to place herbs, change water, and clean the jars when needed.
Quart-size jars give roots enough space to grow without crowding, while still fitting nicely on a windowsill or shelf.
Step 2: Start With Fresh Herb Cuttings or Small Plants
This method works best with herb cuttings or small nursery plants with most of the soil gently rinsed off the roots.
Good herbs for a water-only setup include Basil, Mint, Oregano, and Rosemary!
Place the roots in the jar so they’re submerged, but keep leaves above the water line.
Step 3: Use Clean, Filtered Water
Fill the jar so the roots sit in water, but the stem and leaves stay dry.
Using filtered water helps reduce mineral buildup and keeps roots healthier. Change the water every 3–5 days to keep it fresh and oxygenated.
Step 4: Add Light Nutrients Occasionally
Because there’s no soil, herbs will eventually need nutrients.
Add a small amount of liquid plant food every few weeks, diluted to half strength. This keeps growth steady without overwhelming the plant.
Step 5: Place Jars in Bright, Indirect Light
A sunny windowsill with bright, indirect light works best. Too much direct sun can heat the water and stress roots, so soft light is ideal.
If needed, a small grow light can supplement natural light.
5. A Wall-Mounted Indoor Herb Garden
If you’re short on counter space but still want fresh herbs within reach, a wall-mounted indoor herb garden is a smart and stylish solution. This setup lets you grow herbs vertically, keeping your kitchen functional while adding a cozy, lived-in feel.
Wall-mounted herb gardens work especially well in small kitchens, apartments, or homes where every inch of space matters. When done right, they’re surprisingly easy to care for.

Step 1: Choose a Lightweight Wall System
Start with a simple wall-mounted shelf, rail system, or hanging planter designed for indoor use. Lightweight options are easier to install and safer for everyday spaces.
Floating shelves with brackets, metal rail systems with hooks, or wall-mounted planter boxes all work well for an indoor herb garden.
Step 2: Mount Near a Light Source
Install your wall-mounted herb garden near a window whenever possible. Natural light makes care easier and keeps herbs growing strong.
If the wall doesn’t get enough daylight, pair the setup with a small clip-on or under-shelf grow light to keep herbs healthy year-round.
Step 3: Use Spill-Proof Planters
Choose planters with built-in trays or self-watering inserts to prevent drips and protect your walls. This is especially important indoors, where water damage can happen quickly.
Compact pots work best since large containers add unnecessary weight and make watering harder.
Step 4: Pick Herbs That Stay Manageable
Wall-mounted gardens do best with herbs that don’t get too tall or heavy.
Great choices include Thyme, Oregano, Chives, and Parsley!
Trim regularly to keep plants full and prevent them from leaning outward.
Step 5: Keep Maintenance Simple
Water slowly and check moisture levels before each watering. Because wall-mounted planters dry out a bit faster, it helps to keep a small watering can nearby for quick care.
Harvest often using herb scissors, which encourages fresh growth and keeps plants compact.
6. A Floating Shelf Indoor Herb Garden
A floating shelf indoor herb garden is a great option when you want your herbs to be functional and part of your kitchen decor. This setup keeps herbs off the counter while still making them easy to see, easy to water, and easy to use.
Floating shelves work well in kitchens where wall space is available but counter space is limited. They also give your indoor herb garden a clean, intentional look without feeling cluttered.

Step 1: Install Shelves Near Natural Light
Choose a wall that’s close to a window so your herbs get plenty of daylight. Installing shelves at or slightly below window height helps herbs receive consistent light throughout the day.
If natural light is limited, a slim under-shelf grow light can be added without taking away from the look of your space.
Step 2: Choose Lightweight Pots
Stick with small, lightweight pots to keep shelves safe and easy to maintain. Terracotta or compact ceramic pots work well and allow soil to dry out between waterings.
Make sure each pot has a drainage hole and saucer to protect the shelf.
Step 3: Group Herbs by Light Needs
Place sun-loving herbs toward the brightest side of the shelf and more tolerant herbs toward the edges. This keeps growth even and reduces stress on your plants.
Step 4: Keep Styling Simple
Avoid overdecorating the shelves. Too many items compete with the herbs and make watering harder.
A few neutral pots, simple plant labels, and maybe one small decorative item keep the space feeling calm and functional.
Step 5: Water and Harvest Regularly
Check soil moisture every few days and water only when the top inch feels dry. Harvest herbs often using small herb scissors to encourage fuller growth and prevent plants from getting leggy.
7. A Rolling Cart Indoor Herb Garden
A rolling cart indoor herb garden is perfect if the light in your home shifts throughout the day or changes with the seasons. Instead of working around the sun, you can move your herbs to wherever the light is best — without lifting heavy pots.
This setup is especially helpful in homes with limited window space or in winter when sunlight patterns change.

Step 1: Choose a Slim, Stable Rolling Cart
Look for a narrow rolling cart with two or three tiers. It should be sturdy enough to hold several potted herbs without wobbling but compact enough to fit beside a window or against a wall.
Carts with locking wheels are ideal so everything stays put once you find the right spot.
Step 2: Group Herbs by Light and Size
Place sun-loving herbs like basil and parsley on the top shelf where they’ll get the most light. Herbs that tolerate lower light can go on the middle or bottom shelves.
Grouping herbs by size also makes watering easier and keeps plants from shading one another.
Step 3: Use Pots With Trays
Because the cart will move around, it’s important to prevent spills.
Choose pots with saucers or drip trays so water stays contained. This protects floors and makes quick watering stress-free.
Step 4: Make It Easy to Maintain
Keep a small watering can and herb scissors on one shelf so everything you need is in one place. This turns plant care into a quick habit instead of a chore.
Rotate pots occasionally so growth stays even as the cart moves.
Step 5: Park It Where You’ll See It
Once you find the best light, park the cart somewhere visible, near the kitchen, dining area, or entryway. The more you see your herbs, the more likely you are to care for them and use them daily.
8. A Minimalist Indoor Herb Garden (3–5 Herbs Only)
If you’ve tried growing herbs before and felt overwhelmed, this approach is for you. A minimalist indoor herb garden focuses on growing only what you actually use, which makes care easier and success far more likely.
This setup works because fewer plants mean less watering, less clutter, and fewer chances for something to go wrong.

Step 1: Choose the Herbs You Use Every Week
Think about the herbs you reach for most when cooking. There’s no need to grow everything.
Choosing herbs you use regularly keeps your indoor herb garden practical instead of decorative.
Step 2: Use Matching Pots
Matching pots instantly simplify care and make your space feel calm instead of busy.
Choose small to medium planters with drainage holes and simple saucers. Uniform pots help you spot changes in growth or moisture more easily and keep watering consistent.
Step 3: Keep All Herbs in One Place
Place your herbs together on a windowsill, countertop, or shelf where they receive similar light. This keeps care routines simple and prevents some plants from drying out faster than others.
Step 4: Follow a Simple Watering Rule
Check the soil every few days. If the top inch feels dry, water slowly. If it still feels damp, wait.
A small watering can makes this quick and controlled, which is especially helpful when you’re caring for multiple plants at once.
Step 5: Harvest Often to Keep Plants Healthy
Regular harvesting encourages herbs to grow fuller and prevents leggy stems. Keep herb scissors nearby so trimming becomes part of your cooking routine instead of a separate task.
9. A Kitchen Sink Indoor Herb Garden Setup
The space near your kitchen sink is one of the most underrated spots for an indoor herb garden. It’s convenient, easy to access, and already part of your daily routine. This makes it perfect for busy women!
If you’re someone who forgets to water plants unless they’re right in front of you, this setup can be a game-changer. This is totally me! 😀

Step 1: Choose the Right Herbs for This Spot
Not all herbs love extra moisture, so pick varieties that handle it well like Parsley, Chives, and Mint!
These herbs don’t mind the humidity that comes from washing dishes or running water nearby.
Step 2: Make Sure There’s Enough Light
Most sinks are near a window, but it’s worth paying attention to how much light this area actually gets.
If the space feels dim, adding a small clip-on grow light nearby keeps herbs growing strong without changing your setup.
Step 3: Use Pots With Excellent Drainage
Because it’s easy to overwater near the sink, choose pots with good drainage holes and saucers. This prevents roots from sitting in water and keeps plants healthy.
Terracotta pots work especially well here because they allow excess moisture to evaporate.
Step 4: Water as Part of Your Routine
The beauty of this setup is convenience. When you’re already at the sink, it’s easy to check soil moisture and water only when needed.
A quick check every few days is usually enough.
Keep Your Indoor Herb Garden Simple and Enjoy It
Growing an indoor herb garden doesn’t have to be complicated, perfect, or time-consuming. The best setup is the one that works with your life, certainly not against it.
You don’t need all nine ideas. You just need one that fits your space, your routine, and your energy right now. Start small, keep it simple, and let your confidence grow along with your herbs! 😀 🌱
